Create New Projects with Zapier
If you'd like to streamline your client onboarding process further, Motion.io's Zapier Integration enables you to automate the process of creating projects, inviting clients, and assigning tasks.
This article will provide detailed instructions for setting up a Zap that fully automates your new client onboarding when an event occurs in another software tool you use.
📢 Note: To follow the steps in this guide, you’ll first need to sign up for a Zapier account and connect it to Motion.io. For additional information on how to do this, click here.
Setup Instructions
This guide will walk you through creating a Zap that automatically creates a new project from a template, invites clients, and assigns tasks when an event occurs in another app you use.
Step 1: Specify your trigger event
When creating a Zap, you must always add a "Trigger" as the first step. To specify your trigger event, click the "Trigger" box, search for the app you want to use, and select your trigger action.
The Zap shown in the example begins when a lead form is submitted on a website, but additional trigger options for your own Zap might include:
- When a new message is sent to a specific channel in Slack
- When a person is flagged as a customer in your CRM (ex., Pipedrive, Copper, Hubspot)
- When a new customer is created in your payment software (Ex. Stripe, Paypal)
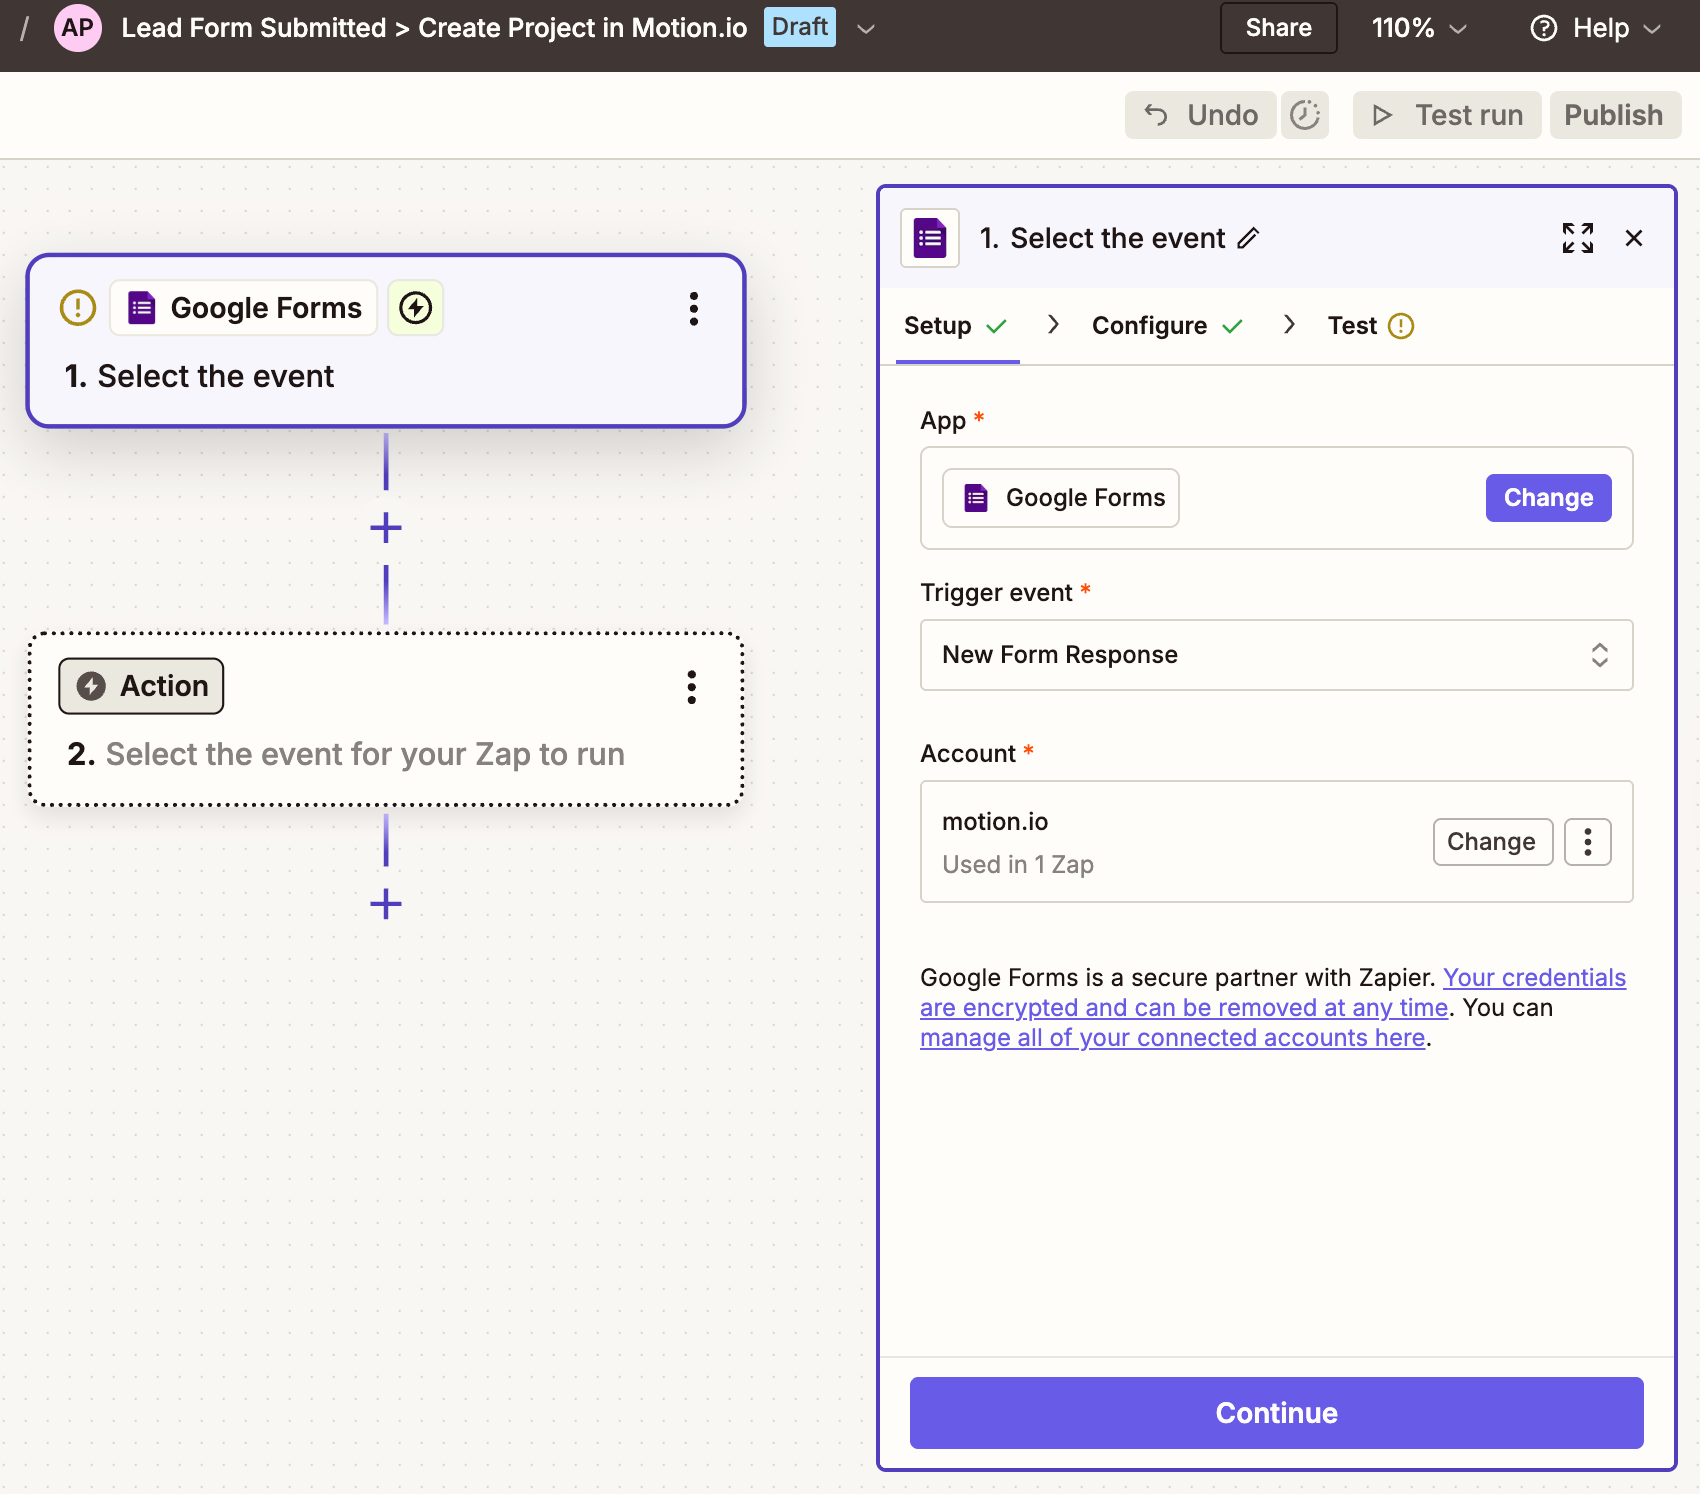
👋 Tip: While the screenshot above shows a Zap that triggers whenever a specific Google form is submitted, you can utilize a wide range of similar apps in your Zap. Examples of other apps you might use include Gravity Forms, JotForms, TypeForm, and more.
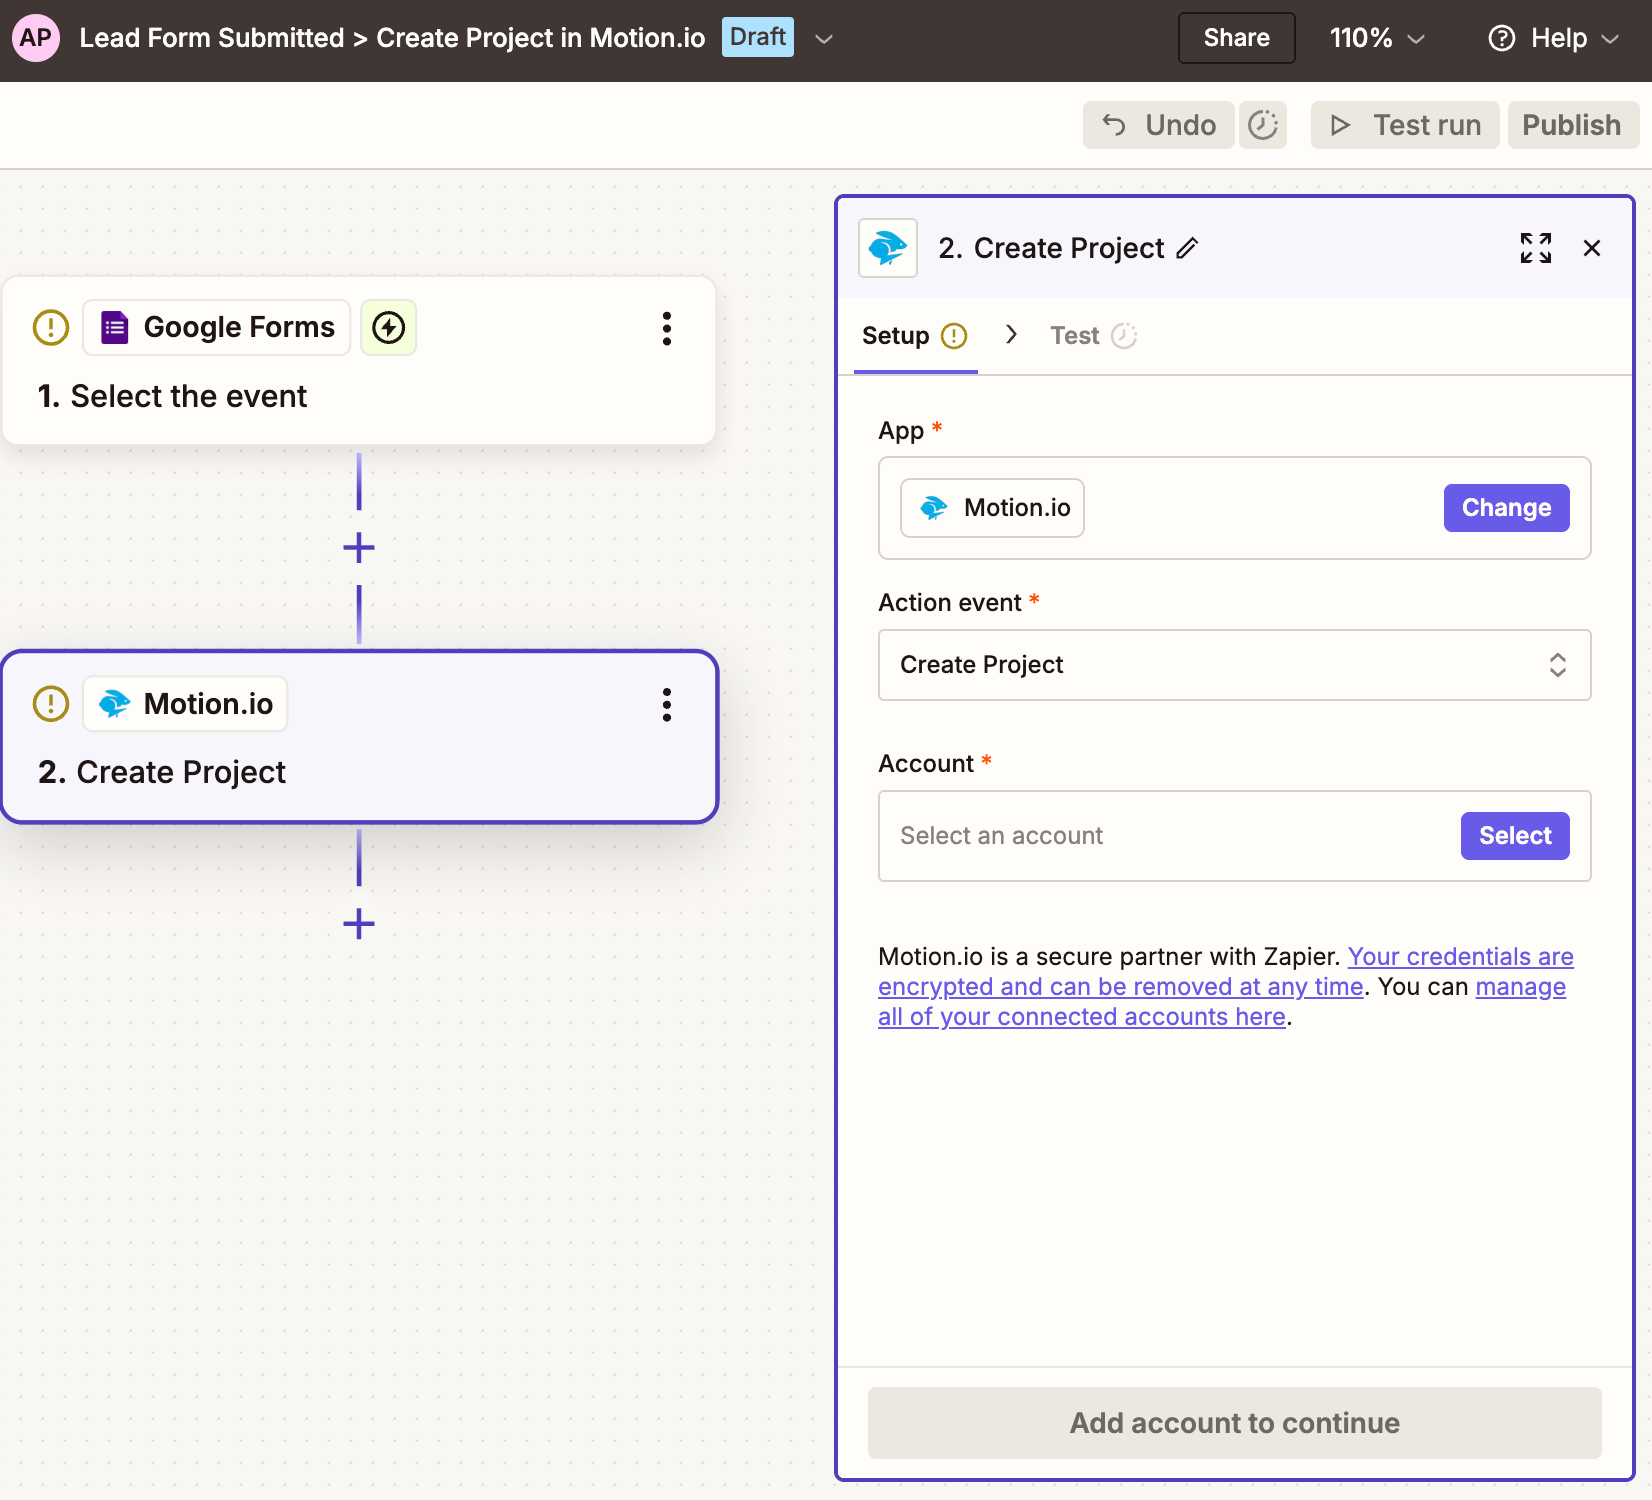
Step 2: Add an action to "Create Project" in Motion.io
Click the box labeled "Action" to add a new action. In the open modal, search for "Motion.io" and select the version labeled "Latest."
From the sidebar on the right, select "Create Project" from the Event dropdown menu.
Step 3: Map fields from the trigger event to the "Create Project" action
Click the dropdown arrow next to "Action" from the options on the right side of your screen.
In the expanded options that appear after clicking the arrow, map the data from your trigger event to the corresponding fields in the "Create Project" action.
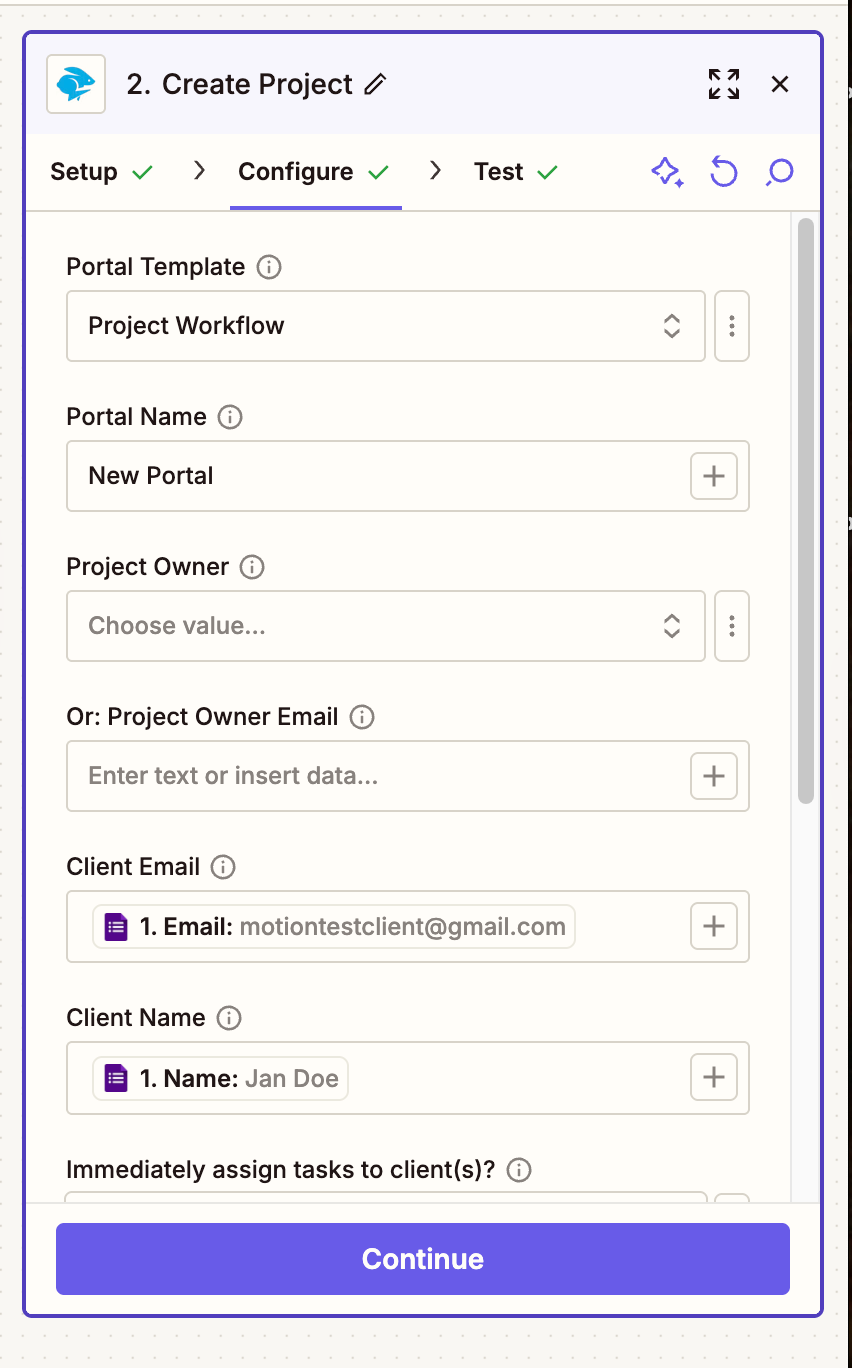
👋 Tip: When setting up a Zap to create a new project in Motion.io, you can specify a project template to use each time your Zap is triggered and automatically assign all tasks included in the template to the client(s) you're adding by setting "Immediately assign tasks to client(s)?" to "True."
Custom Fields & Zapier
You can also automatically populate project custom fields using client responses collected through the form with Motion.io's Zapier integrations.
At the bottom of the Action configuration in Zapier, you'll see a "Custom field values" section.
- In the left-hand field, paste the slug of the custom field you'd like to populate. Be sure to remove the double curly brackets (e.g., use
CUSTOMER-NOTES, not{{CUSTOMER-NOTES}}). - In the right-hand field, select the form field from your trigger step that contains the value you want to use.
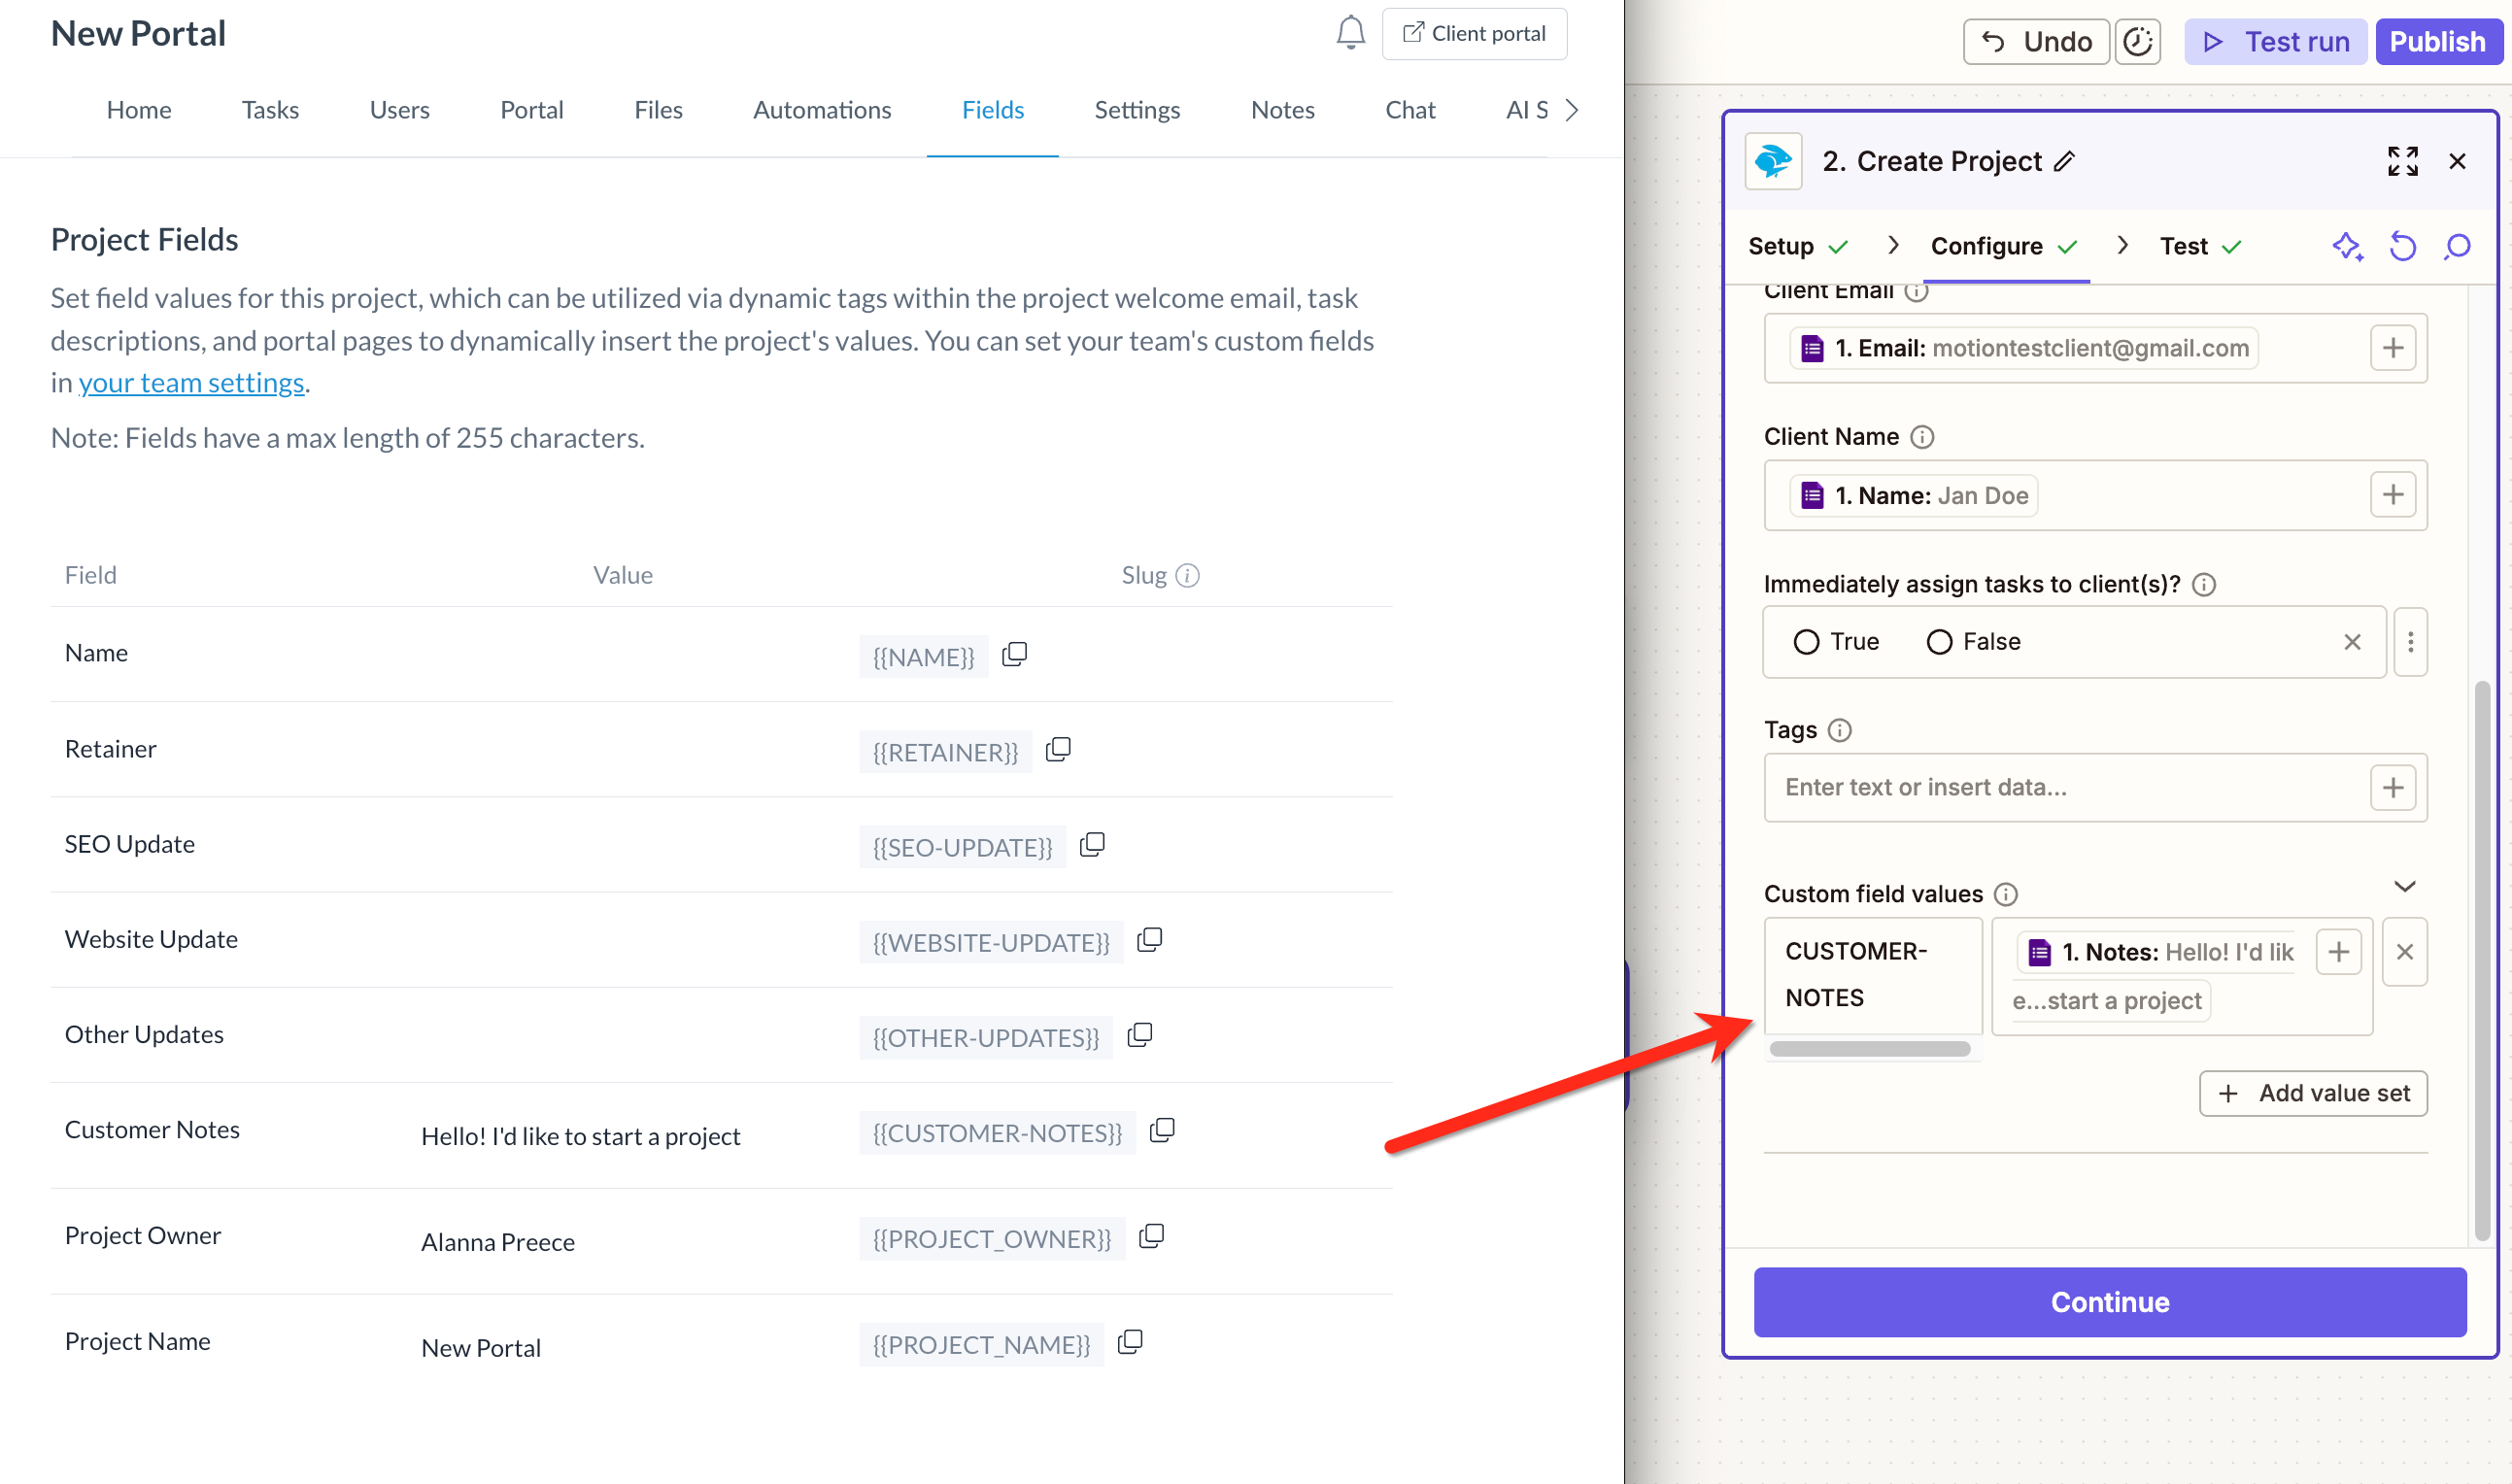
Once the Zap is live, each time a new project is created, the specified custom fields will automatically populate with the matching form data—no manual entry required.
📢 Note: If you'd like to learn more about Motion.io's custom fields feature, you can read more here.